Coin Cutting on the Scroll Saw

The Scroll Saw community is a collection of friends that enjoy using their scroll saws, and sharing and assisting other to do the same. This help is given without fear of competion, rather we take joy in each other success and growth. If we have a fault, it is that we hold back candid criticism in fear of discouraging each other.
I am excited to have the opportunity to introduce new as well as experienced scroll saw users to coin cutting. When I began trying to understand how to do this, I could find no-one doing intricate designs except for those using a handframe (Jewelers Saw), and most of those were only cutting out coin backgrounds. Needless to say, I didn't get much help.

For those that find yourself here, I want to give you the benefit of my experience and hopefully we can cultivate more coin cutters and develop even better techniques through a community effort. If this site is of help to you, please return the good will and contribute patterns and assistance back to the community. "That Community" is only a click away. You can find me and countless other friends in the forums at www.scrollsawer.com and www.scrollsawvillage.com

Although there are many coin cutters that prefer to cut out the backgrounds, and showcase the original artwork on their coins, that approach is very well known and documented other places on the net. There are still aspects of the following approach that you might find valuable. Cutting coins using patterns is not a well known approach, so this is where we will focus. Hang on, the secrets are about to spill . . .


  1. Jewelers Blades. Pick up some 2/0 or 3/0 Pike from Amazon.com. The smaller the blades, the easier they break. Remember 2/0 is a larger blade than 3/0. Buy a gross, you will go through a lot, especially while learning. One additional note, if you are not used to small blade sizes, #2 is much different than #2/0. Make sure you order #2/0 or #3/0. #2/0 is larger and less likely to break than #3/0, but 3/0 will make a sharper inside corner.
  2. If you are doing detail, I would suggest starting with #72 drill bits from Sloans. Flying Dutchmans don't work, period. For beginner patterns, 1/16 from your big box store will probably work fine. The smaller bits are better at getting into very small areas, but are more prone to break.
  3. 3-in-one oil or equivilent (for drilling)
  4. Super glue, preferably the new kind with a brush applicator
  5. Adjustable spring loaded punch for creating a indention for drilling the holes. I like the "General 89" that you can get from Amazon.com or HomeDepot
  6. Ask around for Kennedy half dollars. If you want to try on something smaller (cheaper), you can shrink the pattern down to that size.
  7. If you want to start with smaller coins, you will need some thin wood to superglue the coins to so that you can hold it for the cut.
  8. Acetone (with a small jar to hold it). This is to soak and remove the superglue. Super77 just won't cut it for this.
  9. I use a typical magnifier, but along with that, I have the most powerful reading glasses I could find. You can probably get by without all that magnification for the starter patterns.


  1. Take a good pair of scissors, and under your magnifier, carefully cutout the pattern, staying on the outside of the black line, but close enough that almost no white is showing. Take your time.
  2. Use CA (Superglue) to glue your pattern onto the coin. I found that using a thicker glue works best. Press the pattern down tightly so that all parts of the pattern are in good contact with the coin. Use Polyethylene gloves if you don't like to have glue on your fingers.
  3. Use the spring punch to mark holes
  4. Use a thin CA (superglue), and with the Polyethylene gloves, rub a thin coat over the pattern to seal it. This will help keep the oil from ruining the pattern.
  5. Put a little 3-in-1 oil in each punch mark, and carefully drill those holes. I also use a magnifier at the drill press to line it up. My eyes just aren't that good. Take your time, drill gently as small drill bits break easy.
  6. After the holes are drilled, wipe all the oil from the coin.
  7. Feel the bottom of the coin, de-burr if there are burrs on the bottom holes. Best way I found to do this is by turning over the coin, pattern facing down, placing it on a soft surface, and using the spring punch in each hole.
This should leave you with a pattern secured to your coin. Sounds like a lot of steps, but it is just a few minutes in practice. As beginner, getting the holes drilled and the pattern on was my greatest obstacle as I was trying to drill the holes without oil which caused me a lot of frustration. Once I got the above process down, this part that I dreaded became trivial and made the whole experience much more fun.


  1. If the corner is very steep, consider not turning at the end, but hitting it from both sides.
  2. If you are just starting the cut, cut directly to the line, back the saw up slightly, and grind the path another bladewith wide. That should give you enough room to turn and resume directly along the line.
The following video should give you a "feel" for cutting a simple pattern.


This next video features a more advanced pattern. Turn on subtitles for extra explaination.


  1. Once you are done with the cutting, drop the coin/pattern (and possibly the cheat if you used one) into a small jar of acetone, then go do something else for a few hours. When you return, the pattern should be completely loose from the coin. If when you dry the coin, it has a milky film, replace the acetone with new, and resoak coin for a few minutes to remove residue.
  2. I always polish my coins, even if they already look good because the edges of the cut line are sharp, and polishing not only give it a mirror finish, but it takes the edge off of the cut lines.

    To polish, load a polishing pad on your dremel, then apply some Mothers Mag & Aluminum Polish to the buffer wheel, and proceed to polish the coin. The coin get's hot, but a quick dip in a glass of water will cool it off.


This is really less of a lesson, but more of an explanation as to why you might be able to do this kind of work even if you think you hands are too shaky, or your eyes are too bad.


There are two very important things to understand:

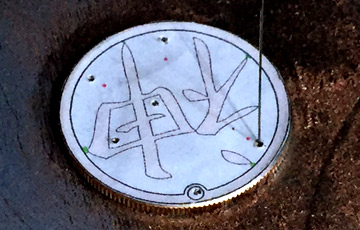
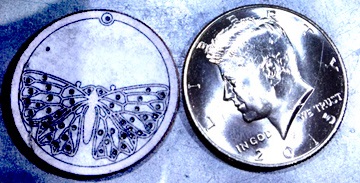
  1. You can magnify the heck of things. When you get older, you lose your ability to focus on things that are close. Magnifiers and reading glasses bring that focus point closer. Depending on the nature of your sight issues, with heavy reading glasses, and a magnifier, you should be able to regain that focus at a much closer distance, and as an equally powerful benefit, things are much much bigger. Unfortunately, the more magnification, the closer you will need to be to your work piece. I have the magnifier right down close to the top of the upper arm, and my face right close to the magnifier. I'm so close that often times when I break a blade, the top arm hits the magnifier, which in turn bumps my face. When you sit down to cut, take a few minutes to work on the magnifier placement and your distance from the magnifier. Unless you have other sight issues, you should be able to find the sweet spot, and see the pimple on a flea. If you have other issues with your eyes that can't be overcome with magnification, then you might not be able to do the more detailed work. Print out the sample pattern on the patterns page, look at it with reading glasses and the magnifier, and if you can get a clear image, you should be good to go. You can only cut what you can see.
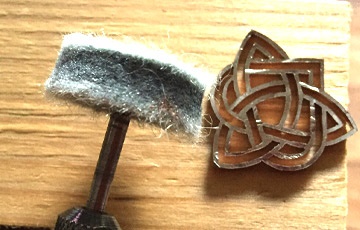
  2. Metal doesn't cut like wood, it is much much slower. But, that said, because of the small scale, you don't need to go as far. So, what this means, is that when you magnify the heck out of things, you see the pattern much bigger, and your cutting rate, because of the very small scale, perceptually is like working with wood on a larger piece. This speaks to cutting at a smaller scale and maintaining control. If metal cut like butter, we wouldn't have a chance. So, cutting small isn't magic, and doesn't require superhuman cutting ability or superman vision. So now you know my secret, I'm not really good, I just cheat.

I'm not saying that you will not need to practice in the medium, like every medium, you will need to get a feel for how metal cuts, and like with wood, it will become more natural with practice. There are techniques that you will learn with a little practice, that makes some of this a lot easier. We will cover these coming up.